Next.js Authentication with NextAuth.js and GraphCMS
Learn how to integrate NextAuth.js with GraphCMS to authenticate your Next.js users.


The popular React framework that has dominated developers node_modules folders over the last few years we all know of is Next.js — and rightly so, with its stellar developer experience, blazing fast compiler, and tons more.
One topic that often comes up in discussions when evaluating if Next.js is right for you is whether or not it can handle authentication. For a long time there wasn't any "documentation" around this, which led to many developers building and pitching their own solutions to handle Next.js Auth.
Let me introduce to you NextAuth.js — Authentication for Next.js. It's completely open source, and you are in control of your data. It boasts itself on being secure, flexible, and easy to use.
Note: You'll need a GraphCMS account, and Next.js application if you're following along. You'll also need your GraphCMS endpoint, and a Permanent Auth Token with permissions to query and mutate the NextUser model.
1. Configure GraphCMSAnchor
I'll make the assumption you already have a GraphCMS account, and project. If not, you know what to do.
We'll opt to store user data from NextAuth.js, including user email and encrypted passwords.
To keep things simple for the purposes of this tutorial, create the model NextUser with two fields:
Email/Single line text/Required/UniquePassword/Single line text/Required/API Only
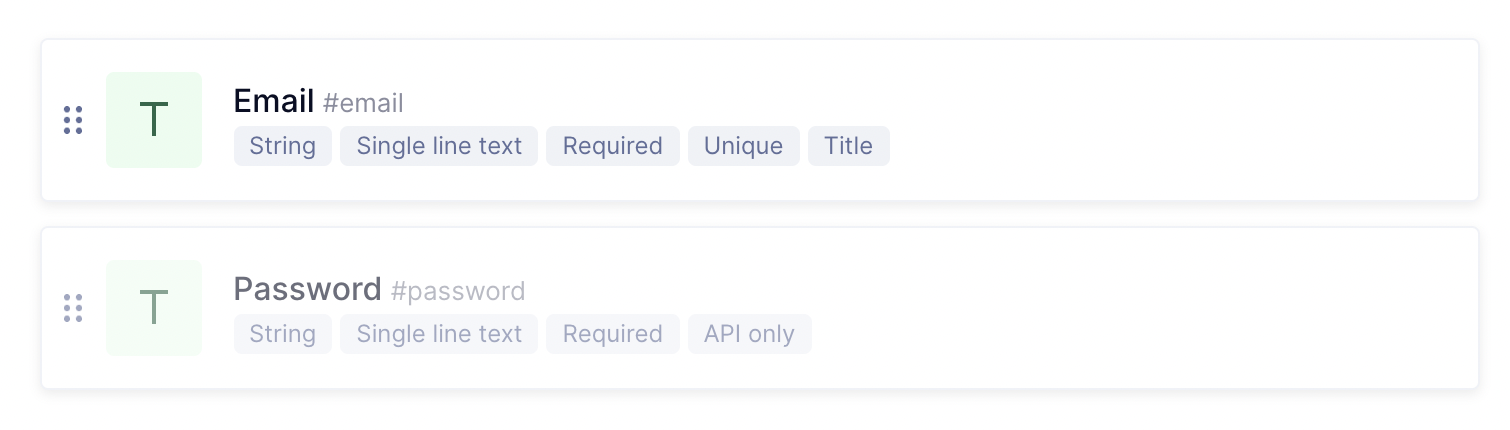
Make sure you set the Password field to API only within the advanced visibility settings.
2. Setup dependenciesAnchor
We'll be using the following dependencies to configure, and work with NextAuth.js:
next-authbcryptgraphql-requestgraphql
npm install next-auth@beta bcrypt graphql-request graphql
Next, create the file .env and add your GraphCMS endpoint and token:
GRAPHCMS_ENDPOINT=GRAPHCMS_TOKEN=
3. Configure NextAuth.jsAnchor
Within your Next.js project, add the file [...nextauth].js in pages/api/auth and invoke the CredentialsProvider.
import NextAuth from "next-auth";import CredentialsProvider from "next-auth/providers/credentials";export default NextAuth({providers: [CredentialsProvider({name: "Email and Password",credentials: {email: {label: "Email",type: "email",placeholder: "jamie@graphcms.com"},password: {label: "Password",type: "password",placeholder: "Password"},},},]})
Now, this code alone won't do anything other than give you an email and password form at the route /api/auth/signin.
Next you'll want to create (or update if it exists) pages/_app.[js,ts] to wrap your application with `SessionProvider, passing it the session from the component props:
import { SessionProvider } from 'next-auth/react';export default function MyApp({Component,pageProps: { session, ...pageProps },}) {return (<SessionProvider session={session}><Component {...pageProps} /></SessionProvider>);}
4. Integrate GraphCMSAnchor
We'll be working within pages/api/auth/[...nextauth].js to handle checking GraphCMS if a user exists, and if they don't, create one.
Add the following imports:
import { compare, hash } from "bcrypt";import { GraphQLClient } from "graphql-request";
Let's now create a GraphQL client for GraphCMS with our endpoint and Permanent Auth Token.
const client = new GraphQLClient(process.env.GRAPHCMS_ENDPOINT, {headers: {Authorization: `Bearer ${process.env.GRAPHCMS_TOKEN}`,},});
Now, we'll add a query to get a user by email and a mutation to create a user with an email and password:
const GetUserByEmail = gql`query GetUserByEmail($email: String!) {user: nextUser(where: { email: $email }, stage: DRAFT) {idpassword}}`;const CreateNextUserByEmail = gql`mutation CreateNextUserByEmail($email: String!, $password: String!) {newUser: createNextUser(data: { email: $email, password: $password }) {id}}`;
Don't worry, we won't be saving passwords as plain text, but instead using the bcrypt library we installed to hash, and verify.
Inside of the CredentialsProvider config below credentials, add the following authorize function:
authorize: async ({ email, password }) => {const { user } = await client.request(GetUserByEmail, {email,});if (!user) {const { newUser } = await client.request(CreateNextUserByEmail,{email,password: await hash(password, 12),});return {id: newUser.id,username: email,email,};}const isValid = await compare(password, user.password);if (!isValid) {throw new Error("Wrong credentials. Try again.");}return {id: user.id,username: email,email,};},
5. Current user UIAnchor
Now, let's finish by updating creating an pages/index.js to show our current user state and links to sign in/out based on our session state.
import { useSession, signIn, signOut } from "next-auth/react";function AuthLinks() {const { data: session, status } = useSession();const loading = status === "loading";if (loading) return null;return (<>{session ? (<p><span>Signed in as {session?.user?.email}</span><button onClick={signOut}>Sign out</button></p>) : (<><button onClick={signIn}>Sign in</button></>)}</>);}export default function IndexPage() {return <AuthLinks />;}
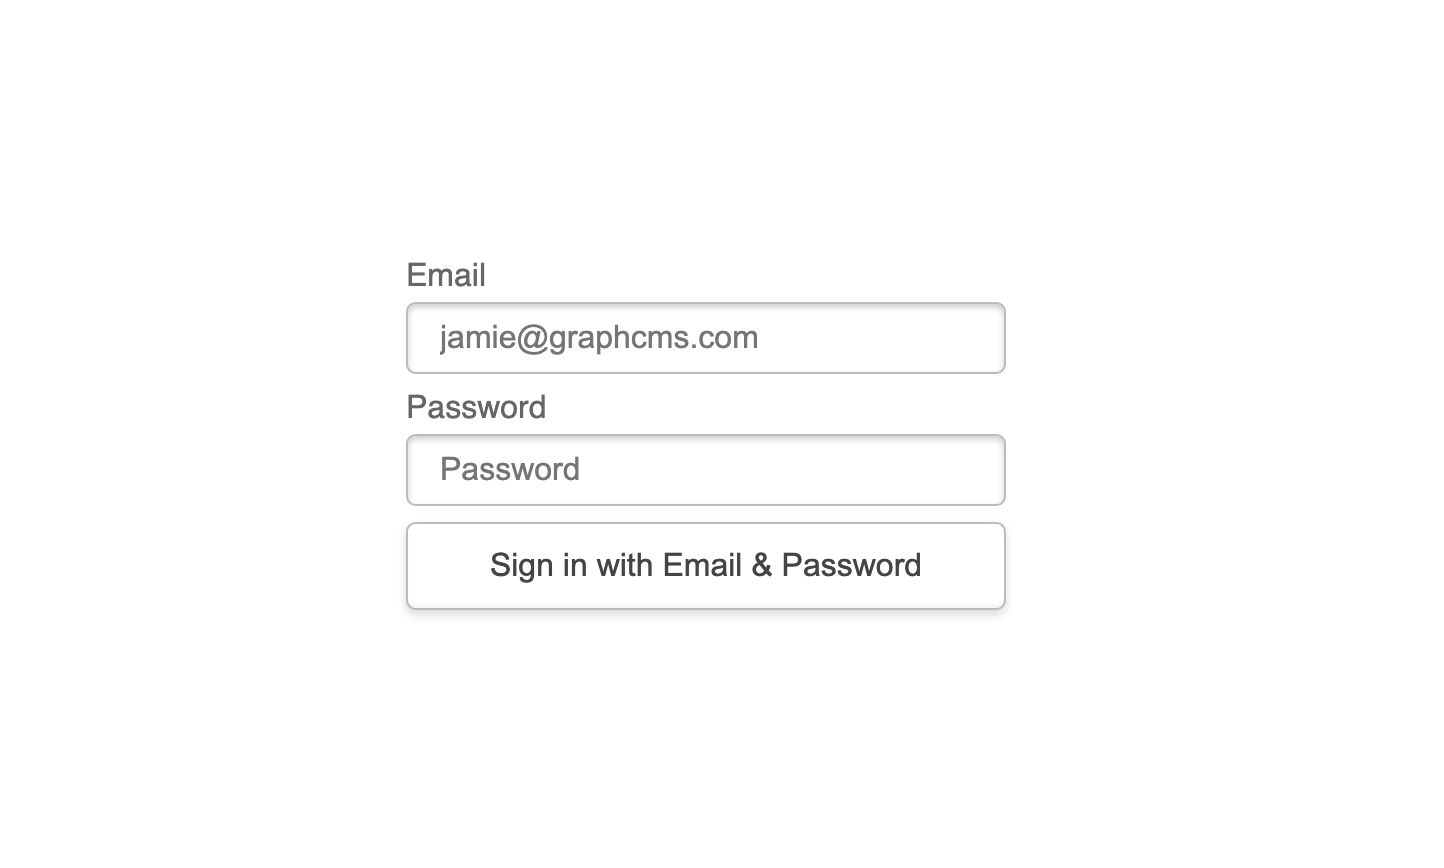
6. DemoAnchor
You should by now have something that looks like this:
There you have it! You've now used NextAuth.js and GraphCMS to authenticate your Next.js users.

