Get Notified by SMS when a new Content Entry is Ready for Review
In this tutorial, we will build a SMS notification workflow for growing content teams using Pipedream and Twilio.


As your content team grows, you will likely create a process for publishing content with multiple stakeholders. You may currently copy/paste links from preview URLs or to the GraphCMS UI to ask for a review from your team, but today I will show you a quick and easy way to automate this process.
GraphCMS provides Content Stages that let you publish content to multiple stages. Every project comes with DRAFT and PUBLISHED. We see many teams create stages for QA and RFR (Ready for Review) as well.
In this post, we’ll work with the base DRAFT stage, which is available on our free tier, so even if you aren’t paying for custom content stages, you can benefit from this guide. If you’re on a paid plan, you can alter this guide to work with any custom content stage, as we’ll see later…
We’ll be using the low-code API platform Pipedream that lets us connect multiple triggers and sources.
You’ll need to create an account with these providers to continue:
Step 1: Create a new Pipedream WorkflowAnchor
Once logged into Pipedream, you’ll want to create a new workflow.
From here, select HTTP API from the available triggers.
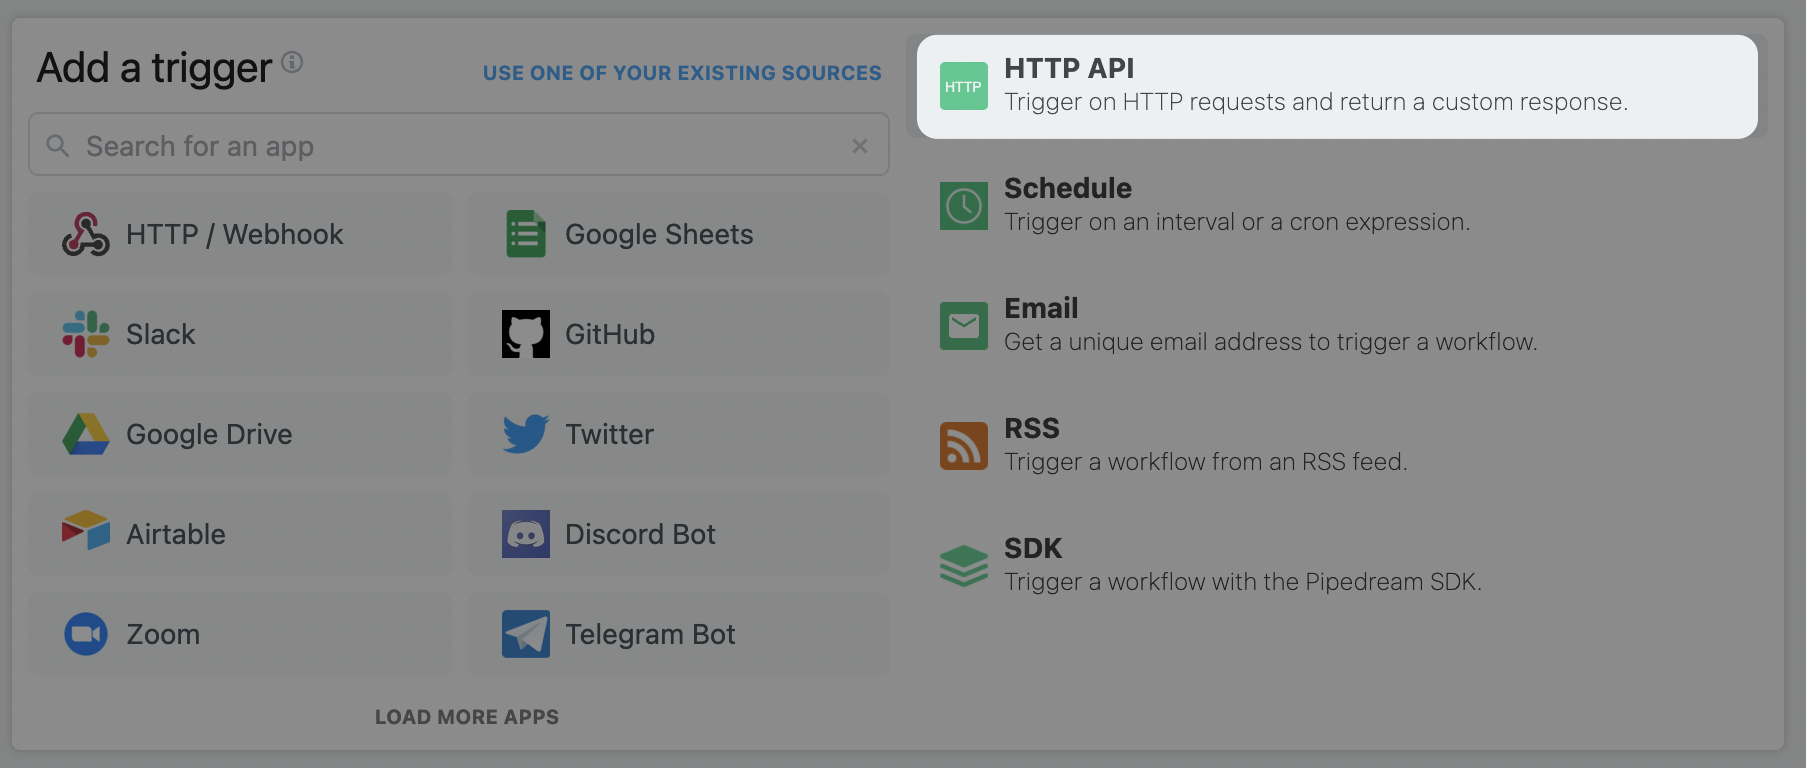
Once added, you’ll be given a unique immutable endpoint for your HTTP trigger. You’ll need this to connect GraphCMS.
Step 2: Connect GraphCMSAnchor
Before we continue configuring the Pipedream workflow, let’s create a webhook inside GraphCMS using the URL to our Pipedream trigger.
Once logged into GraphCMS, Create a new Webhook.
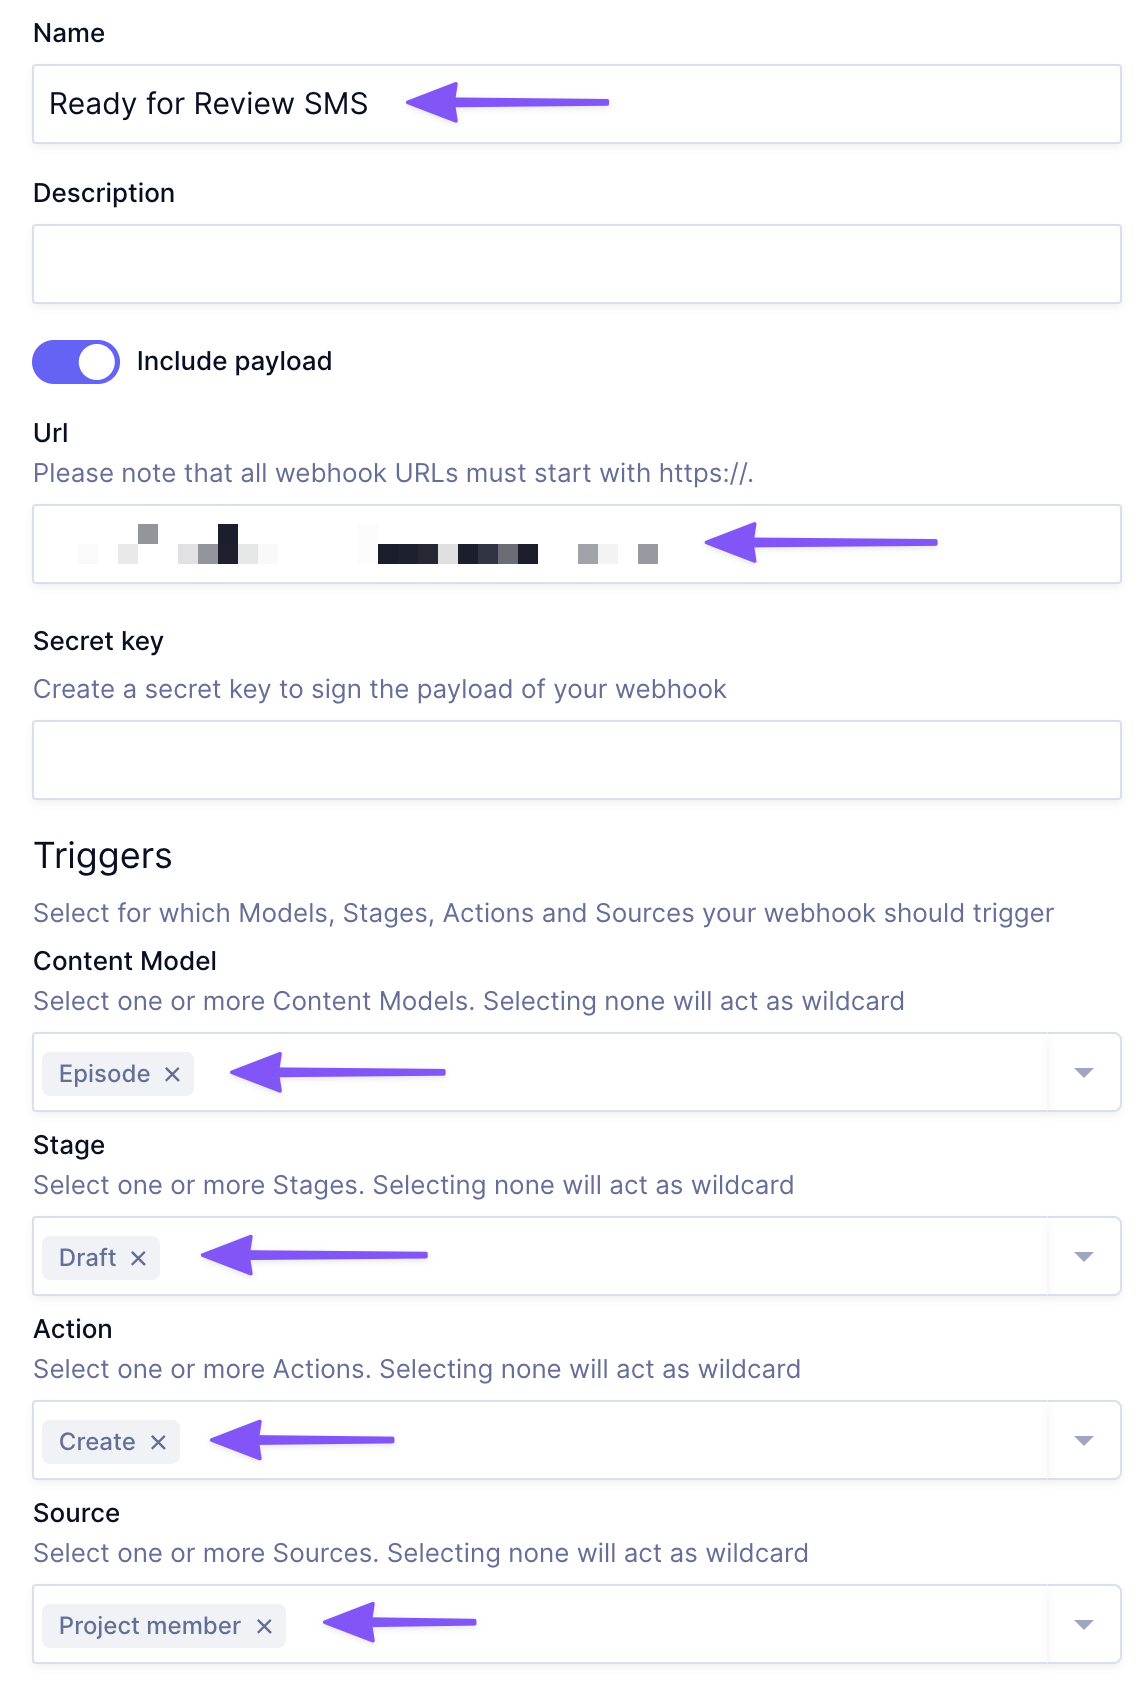
You’ll want to name it, give it an optional description, enable including the payload, and set the URL to be the same as what Pipedream gave for the HTTP trigger.
Then, you’ll want to configure the GraphCMS triggers. These triggers are the conditions that will invoke the webhook, and send the payload to Pipedream in a request.
We’ll configure the webhook, so when new Episodes are Created in the Draft stage by a Project member, it will trigger the specified URL.
Step 3: Send Test TriggerAnchor
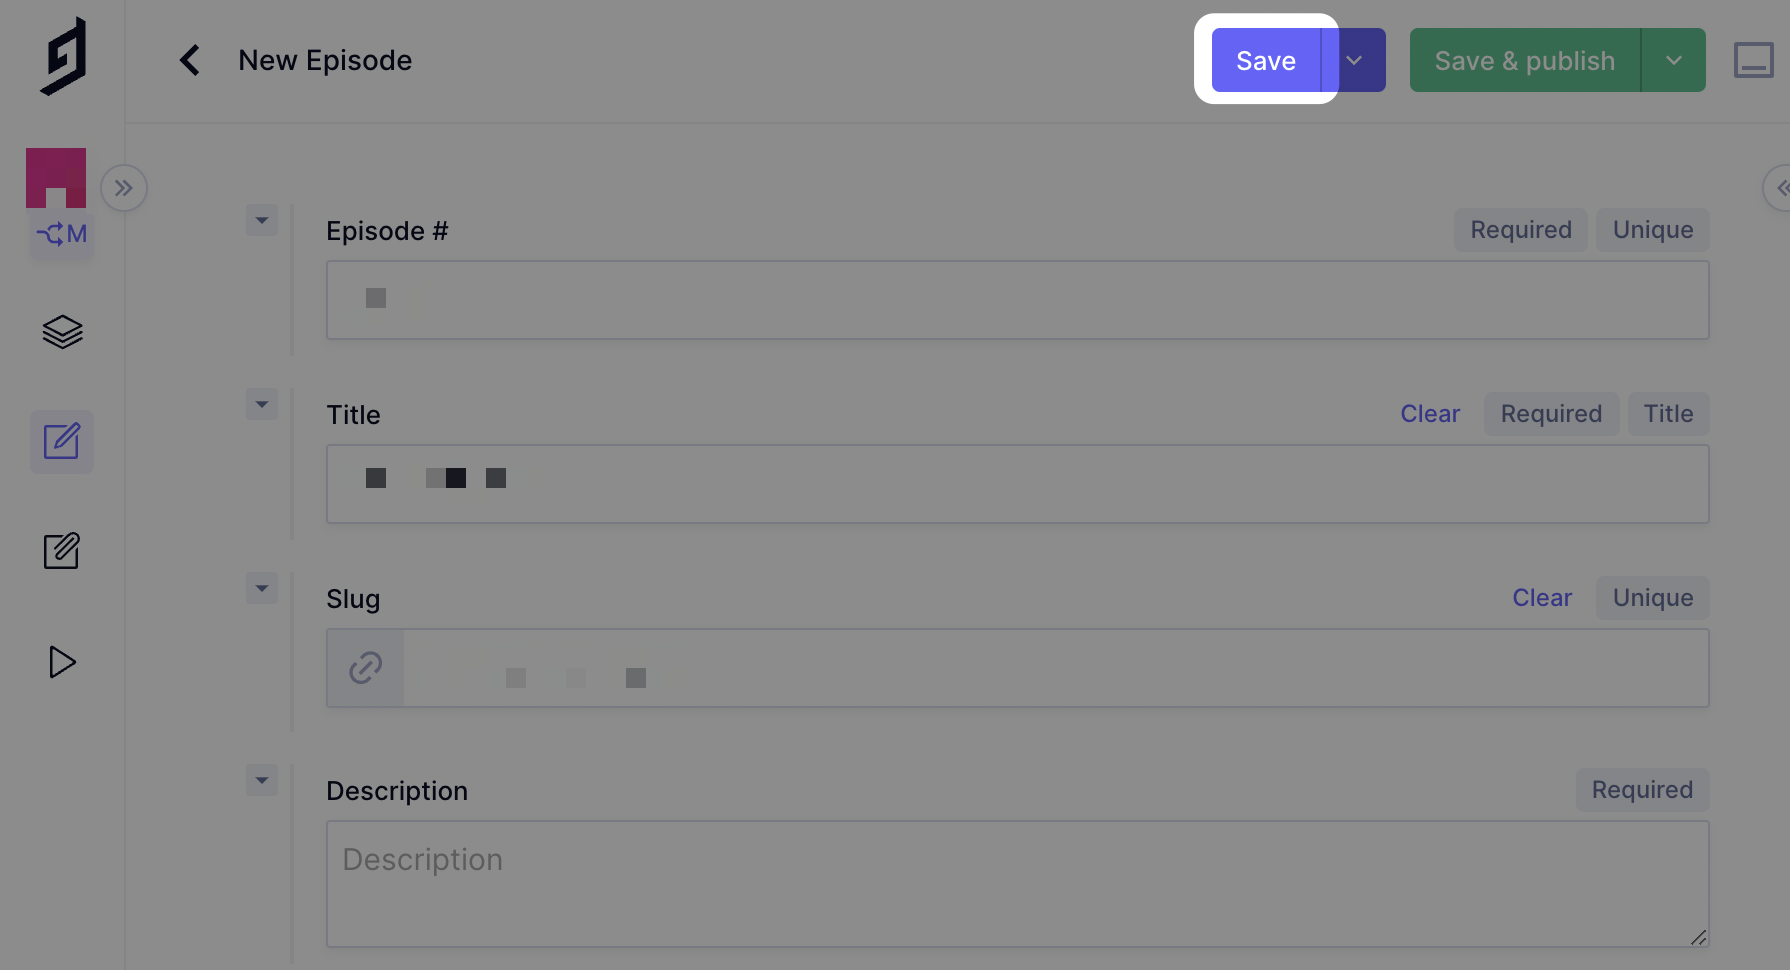
Now, we will create a new Episode in the Draft stage to trigger the webhook. You’ll see why this is helpful when configuring the Pipedream workflow with autocompletion on our payload data.
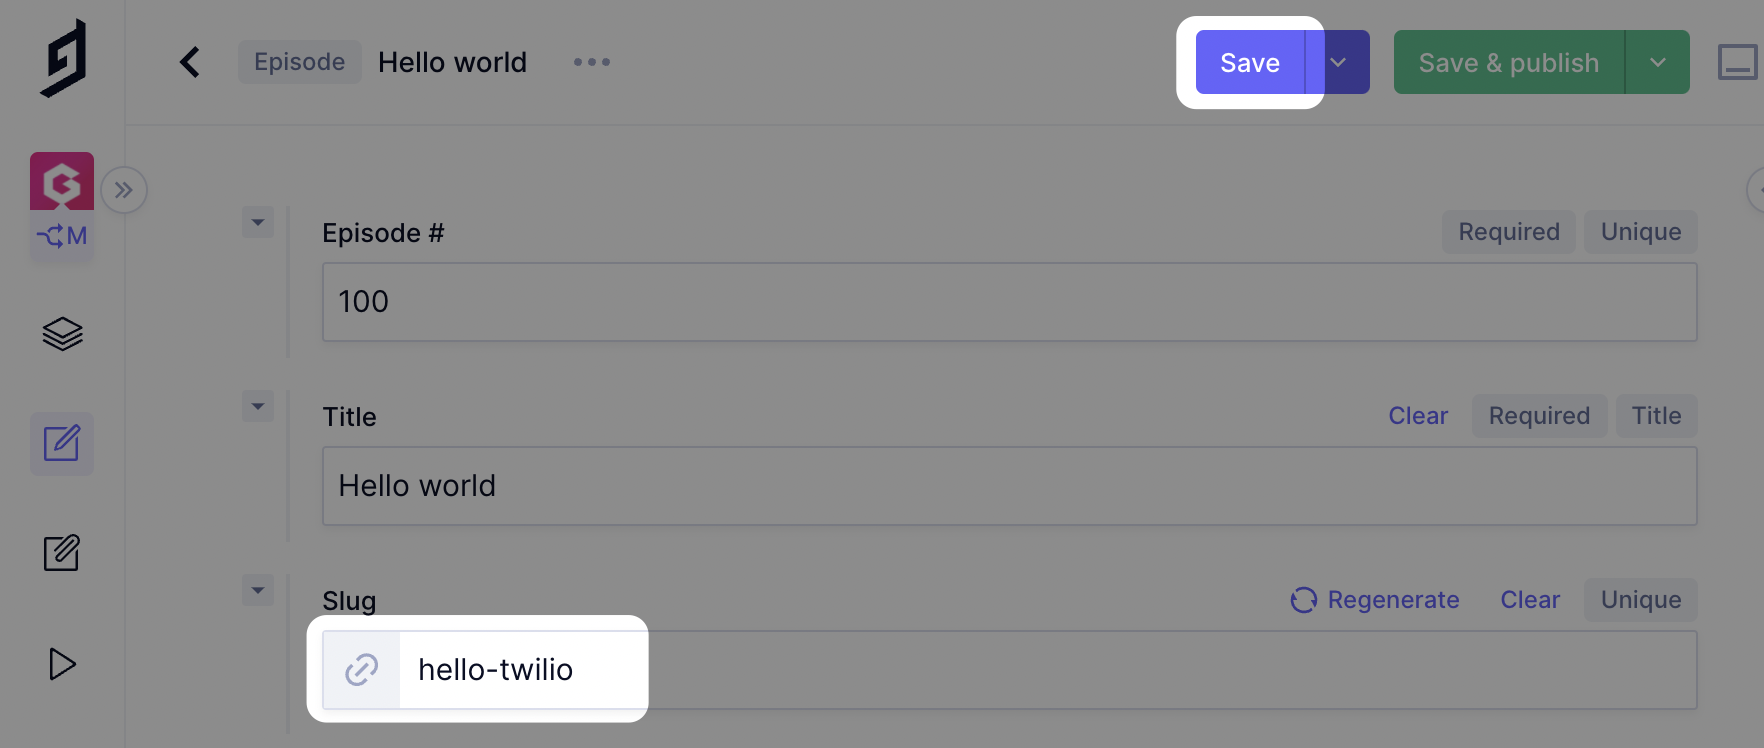
Head over to the content model you selected inside of the Content Editor, and Save a new entry. GraphCMS by default will Save this to the Draft content stage.
You should now see inside of Pipedream a new event you can inspect:

Step 4: Connect Twilio to PipedreamAnchor
Next, we can use the results from the test above to check our workflow trigger is working, and we can now connect Twilio.
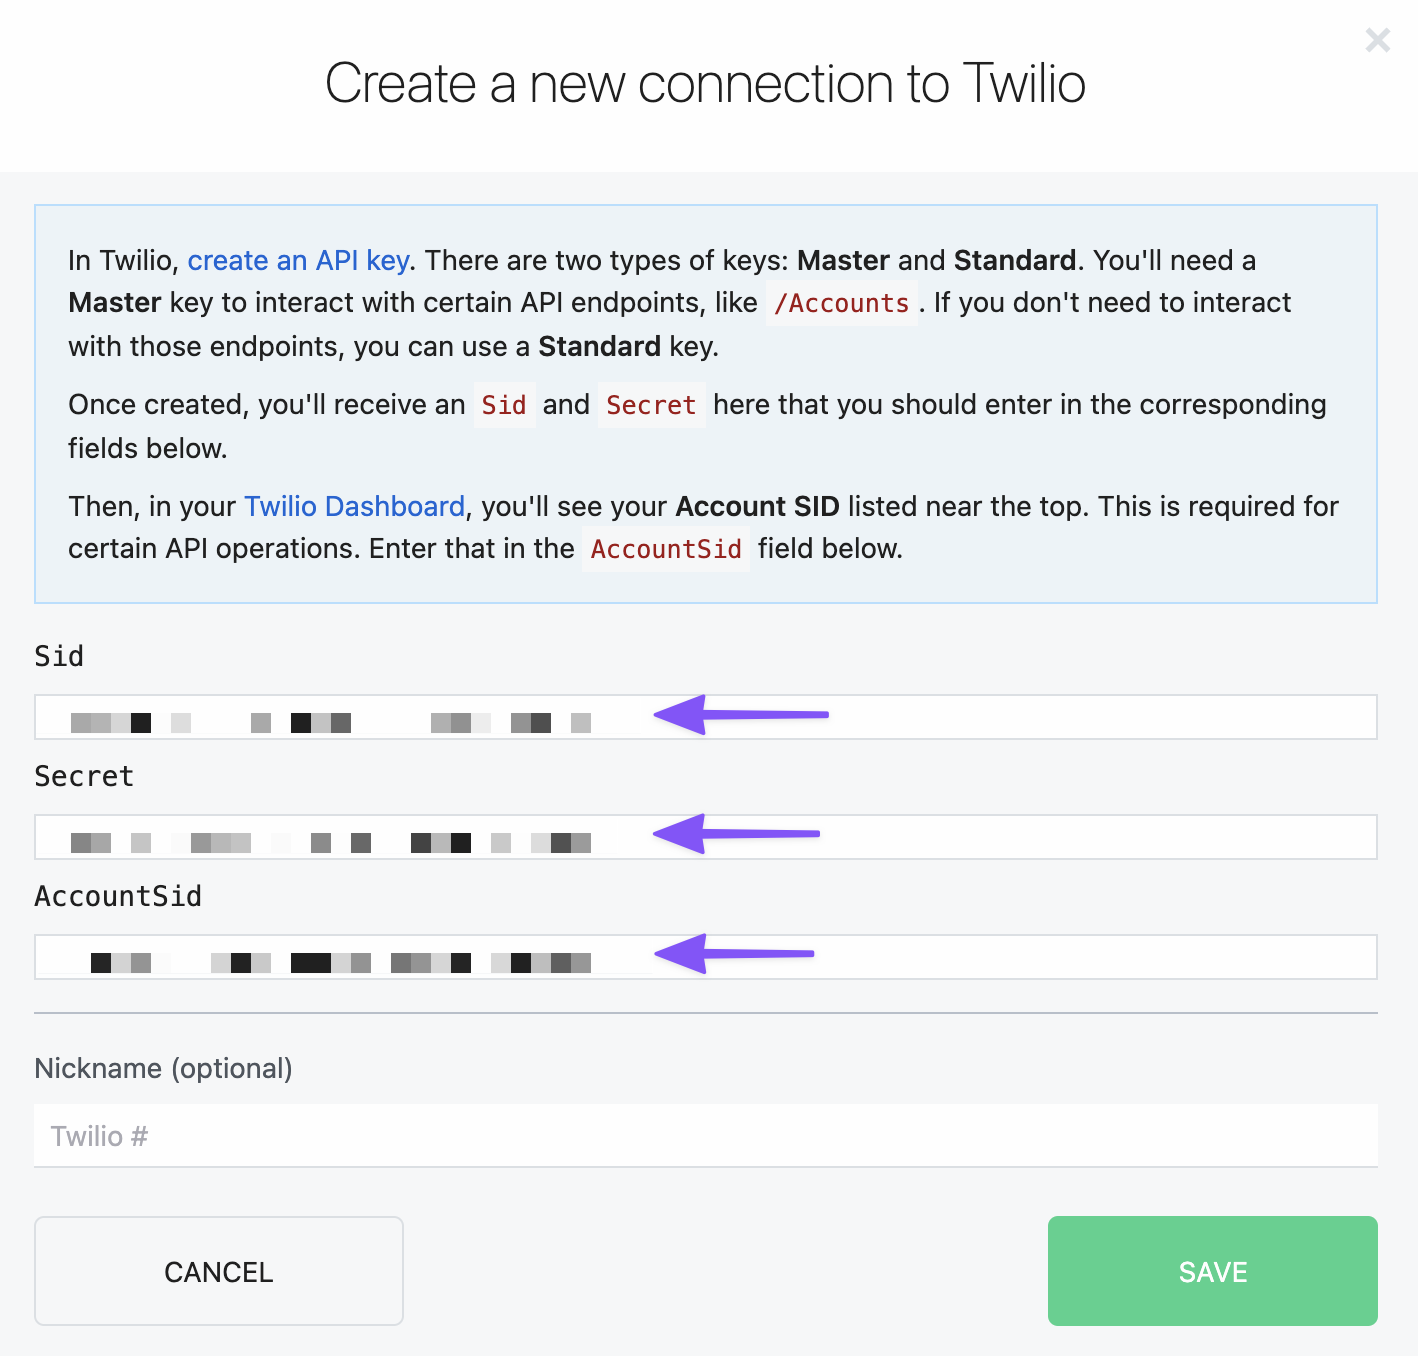
You’ll need to create a new Twilio API Key, and know your Account SID to add Twilio.
Inside your new Pipedream workflow, you’ll want to click the + to add another stage in your workflow.
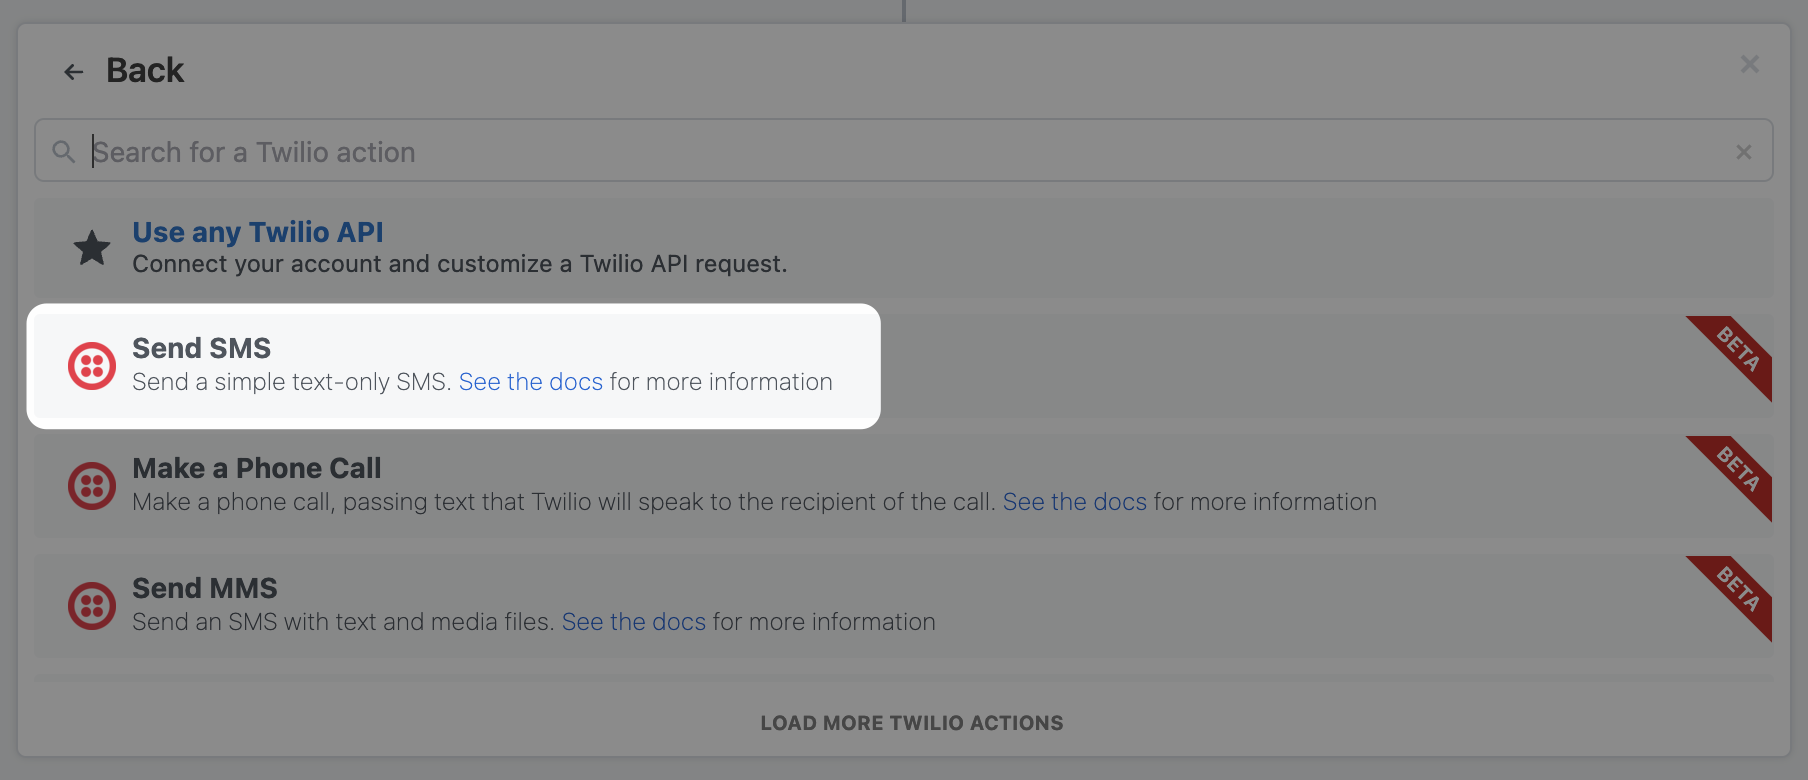
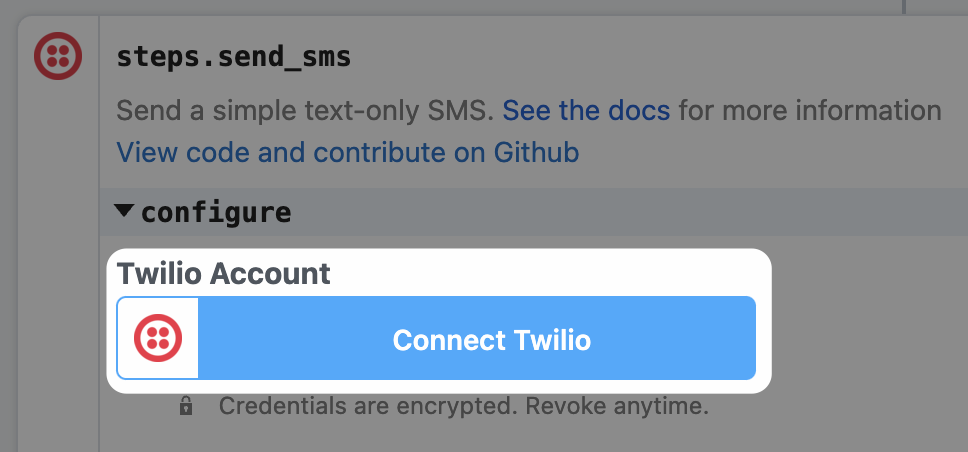
From the list of available actions, search for Twilio, and select Send SMS:

Next from the Twilio Account area, you’ll want to Connect Twilio.
Here you will now need to add your API Key SID + Secret, and Account SID. Follow the instructions in the modal to learn how to create an API Key.
Step 5: Configure Twilio Message ContentsAnchor
Now that Twilio is configured and ready to go, we can set the contents of our message to include a link to a preview of the new content entry.
Where you send people to preview your post is entirely up to you. Here I’m using a staging subdomain that has GraphCMS API access to fetch from the Draft stage, so I know that when I send this link to someone, they’ll be able to see what I have just saved inside of GraphCMS.
You could opt to send a Next.js Preview Link, or link them to the GraphCMS content editor itself.
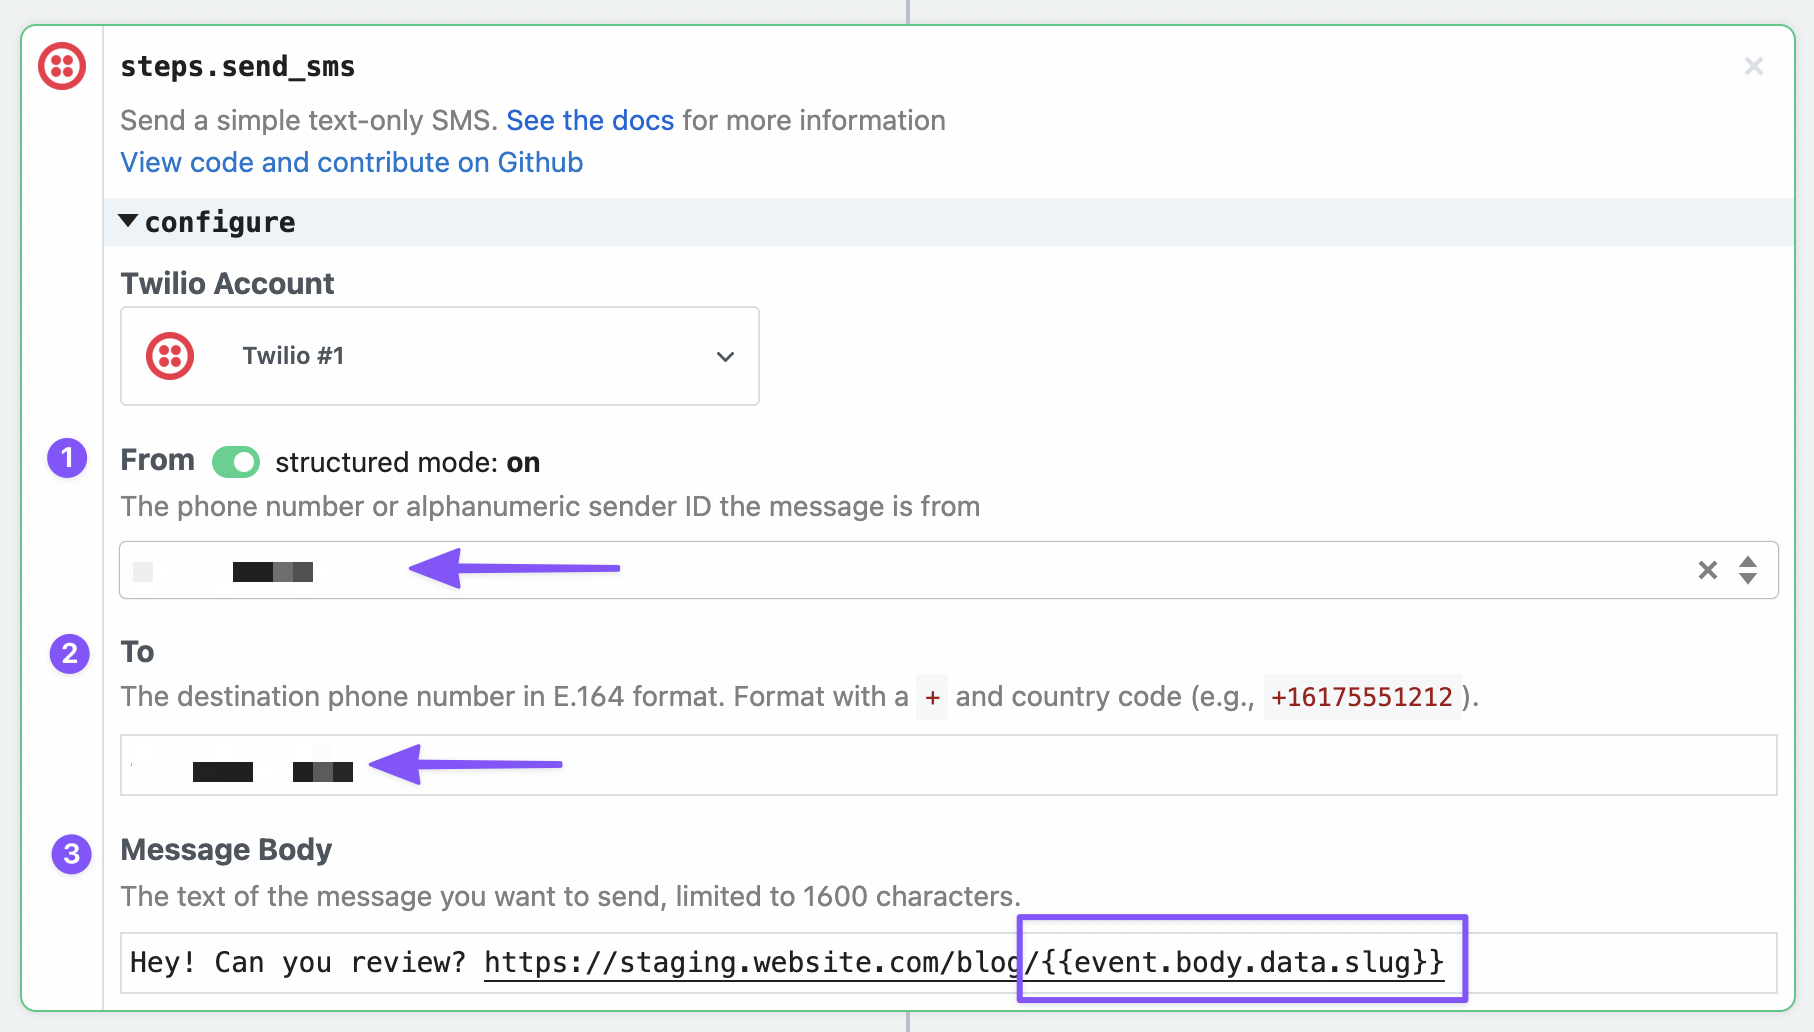
You’ll need to set the From phone number you created in your Twilio account and who this message is sent To.
You could add a field inside of your GraphCMS content model to include a phone number, but for the purposes of this post, let’s add a static phone number.
Then, all that’s left to do is set the Message Body. Here you can include a custom message, AND use special characters to inject content from the payload sent from GraphCMS.
Here you can see I’m using {{event.body.data.slug}} which will include the slug of the new Episode I created.
Now all that’s left to do is Save & Deploy.

Step 6: Try it out!Anchor
Now all that’s left to do is head over to GraphCMS; and create a new content entry, save it, and wait for the message to arrive!
A few moments later…
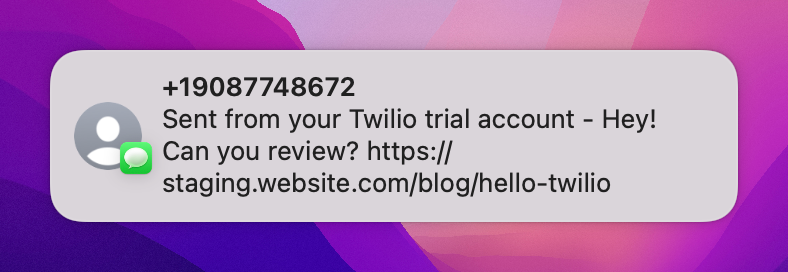
Success!

