Quickstart
IntroductionAnchor
A UI extension is a web app inside GraphCMS. They allow you to add custom components in the content editor.
You can build any UI component, like basic inputs, image pickers, and conditional fields.
The sky is the limit.
What you will buildAnchor
The demo UI extension we will be building is the Hello UIX World. It's a basic input field to store text data.
You will also learn how to add custom settings, like an API Key to connect to a 3rd party service provider.
PrerequisitesAnchor
To complete this tutorial:
- You need the latest LTS version of Node.js installed on your machine. If you don't have it, you can download it here
- You should be comfortable using a command line tool and any IDE or text editor of your choice
- You should be familiar with JavaScript and React
- You need a free GraphCMS account and a project. You can signup here.
💡 If you're new to GraphCMS, create a project using the Blog Starter template
What you will learnAnchor
In this tutorial, you will learn:
- How to create a UI Extension
- How to run and test the UI Extension on your local development environment
- How to add the UI Extension to a Model
- How to add custom settings to your UI Extension, like an API Key
- How to deploy your UI Extension to Vercel
- How to install and use your UI Extension in production
- (Bonus) How to display data into table content view
Step 1: Creating a UI ExtensionAnchor
1. Create React project
# create a project with npmnpx create-react-app hello-uix-guide# change directorycd hello-uix-guide
Now, open the project in the code editor of your preference.
2. Create a new React component
// src/extensions/HelloUixWorld.jsimport { useState, useEffect } from 'react';const MyField = () => {const [localValue, setLocalValue] = useState('');useEffect(() => {// Will be used soon}, [localValue]);return (<input value={localValue} onChange={(e) => setLocalValue(e.target.val)} />);};const HelloUixWorld = () => {return <MyField />;};export default HelloUixWorld;
3. Import the component into your app
// src/App.jsimport HelloUixWorld from './extensions/HelloUixWorld';function App() {return <HelloUixWorld />;}export default App;
💡 You can replace all content of App.js with the code above
4. Run the app locally
npm run start
By visiting http://localhost:3000 on your browser, you should see a very basic HTML input field.
Now, let's transform it into a GraphCMS UI Extension!
Step 2: Using GraphCMS React SDKAnchor
1. Installing the React SDK
In order to transform it into a UI Extension, you must install GraphCMS React SDK as a dependency on your project. You can do it running the following command on your Terminal:
yarn add @graphcms/uix-react-sdk
2. Adding React SDK
Now, let's import some SDK components, hooks and enumerations from GraphCMS SDK.
Start with importing the Wrapper component and useUiExtension hook from the library inside your React application, as well as the FieldExtensionType and FieldExtensionFeature enumerations.
You should add the following code at the top of the HelloUixWorld.js file. Remember to import useEffect hook at the top.
// src/extensions/HelloUixWorld.jsimport { useState, useEffect } from 'react';import {Wrapper,useUiExtension,FieldExtensionType,FieldExtensionFeature,} from '@graphcms/uix-react-sdk';
Then, add useUiExtension hook into MyField and adjust the code accordingly, like the following example:
const MyField = () => {const { value, onChange } = useUiExtension();const [localValue, setLocalValue] = useState(value || '');useEffect(() => {onChange(localValue);}, [localValue, onChange]);return (<input value={localValue} onChange={(e) => setLocalValue(e.target.value)} />);};
Then, we need to add the extension declaration:
const declaration = {extensionType: 'field',fieldType: FieldExtensionType.STRING,features: [FieldExtensionFeature.FieldRenderer],name: 'Hello UIX World',};
Finally, let's wrap our custom input field with the Wrapper component:
const HelloUixWorld = () => {return (<Wrapper declaration={declaration}><MyField /></Wrapper>);};
Your complete custom UI Extension code should look like this:
// src/extensions/HellowUixWorld.jsimport { useState, useEffect } from 'react';import {Wrapper,useUiExtension,FieldExtensionType,FieldExtensionFeature,} from '@graphcms/uix-react-sdk';const MyField = () => {const { value, onChange } = useUiExtension();const [localValue, setLocalValue] = useState(value || '');useEffect(() => {onChange(localValue);}, [localValue, onChange]);return (<input value={localValue} onChange={(e) => setLocalValue(e.target.value)} />);};const declaration = {extensionType: 'field',fieldType: FieldExtensionType.STRING,features: [FieldExtensionFeature.FieldRenderer],name: 'Hello UIX World',};const HelloUixWorld = () => {return (<Wrapper declaration={declaration}><MyField /></Wrapper>);};export default HelloUixWorld;
3. Testing UI Extension on Localhost
At this point, you should see the "SDK connection error, check logs" message in your browser. The reason is that it's expected to be running from GraphCMS application. So, you should just ignore this message.
Now, let's install and test your new UI Extension on localhost by following these steps:
-
Go to https://app.graphcms.com and open any existing project
💡 If you don't have a project yet, use the Blog starter 😉
-
Navigate to Project Settings > UI Extensions
-
Click on Add UI Extension button
-
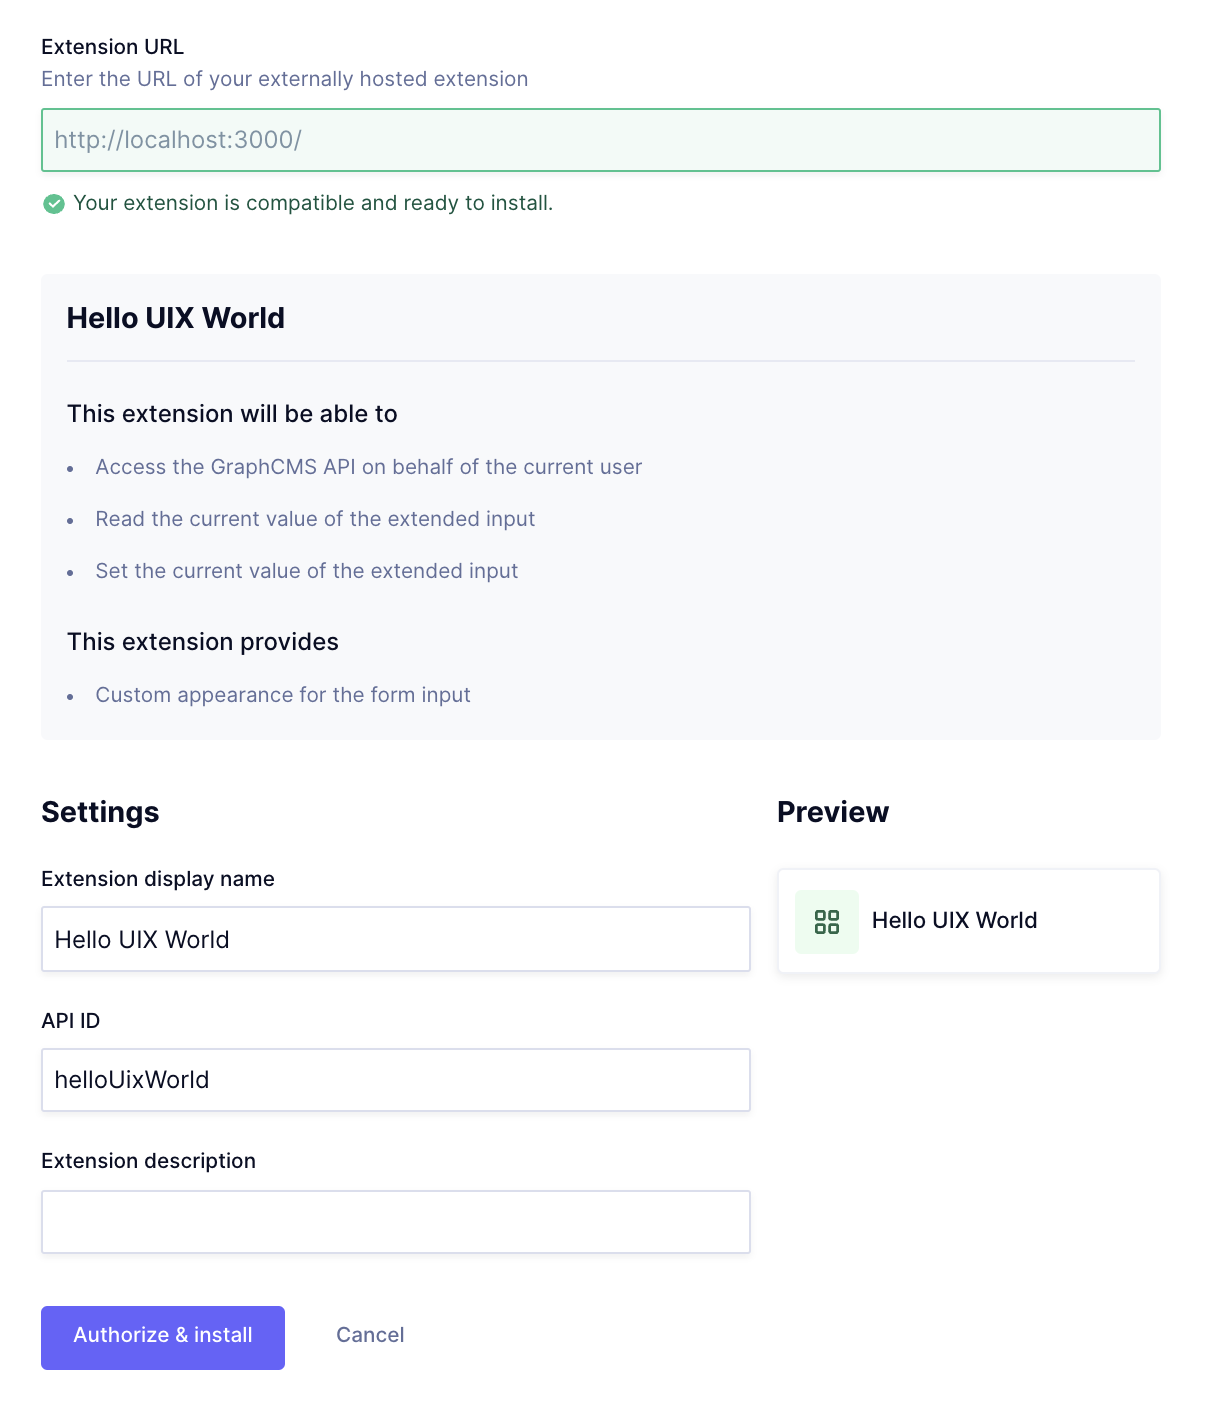
On Extension URL field, enter http://localhost:3000
-
Click on Run compatibility test button
-
Finally, fill in your custom UI Extension name and description, and click on Authorize & Install.
If everything went well, you should see something like this:
Step 3: Adding Custom UI Extension to ModelAnchor
Now, it's time to use your new UI Extension.
Follow these steps:
- Go to Schema
- On the left, click on the model you want to add the new UI Extension
- On the right, you should see your new UI Extension under Strings fields
- Click on your UI Extension to add it into the model
- Enter some information like Display Name, API ID, etc
- When you're ready, click on Create button
Step 4: Using your Custom UI ExtensionAnchor
- On the left navigation, go to Content
- Select the model you've added the UI extension in the previous step
- Click on Create Item button on the top right corner or Edit and existing one
- Enter some text into the field and click on Save
💡 You can see your new data on API Playground
Step 5: Adding Custom Settings to UI ExtensionAnchor
Let's say you are building a UI Extension that needs an API Key and you want to prompt user to enter this information during the installation process.
You can do it by adding the config property to the extension declaration:
- On your Code Editor, open
HelloUixWorld.jsfile - Add the following code into
const declarationand save the file
// src/extensions/HelloUixWorld.jsconst declaration = {extensionType: 'field',fieldType: FieldExtensionType.STRING,features: [FieldExtensionFeature.FieldRenderer],name: 'Hello UIX World',config: {API_KEY: {type: 'string',displayName: 'API Key',description: 'API Key for this UI Extension',required: true,},},};
- Go back to your browser and open your project dashboard
- Go to Project Settings > UI Extension
- On Hello UIX World, click on the three dots and then click on Edit
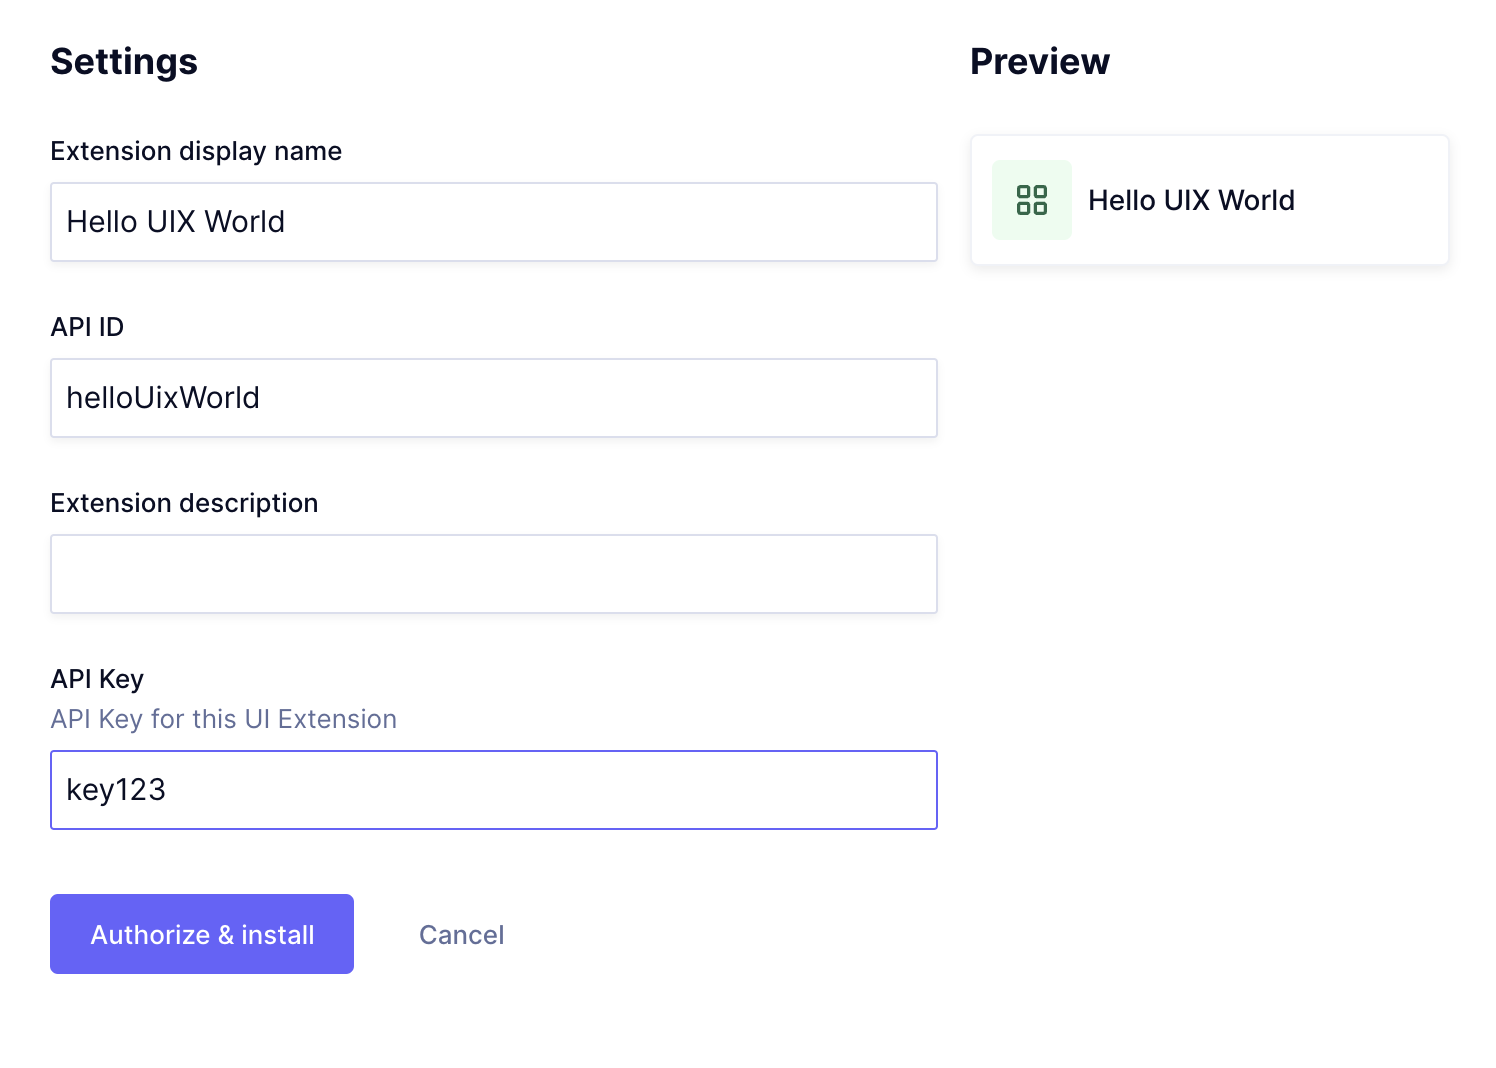
- Click Refresh next to the Edit button
Now, you should see the new API Key field. Once it's a required one, enter any text and hit the Update button.
Step 6: Deploying your UI ExtensionAnchor
To use your UI Extension in a live website or application, you should host it somewhere on the internet. For the sake of this tutorial, we will deploy it on Vercel. But you can use any hosting service.
Do the following steps:
- Open your Terminal
- Navigate into your project root directory and run
npx vercel
cd hello-uix-worldnpx vercel
- Follow the step-by-step guide on your Terminal
- Once it's deployed, the extension URL will be automatically copied to your clipboard
- Open your project dashboard on your browser
- Go to Project Settings > UI Extension
- On Hello UIX World, click on the three dots, then click on Edit
- Click on Edit button next to the Extension URL field
- Replace Extension URL field with the new URL
- Click on the OK button
- Finally, click on the Update button
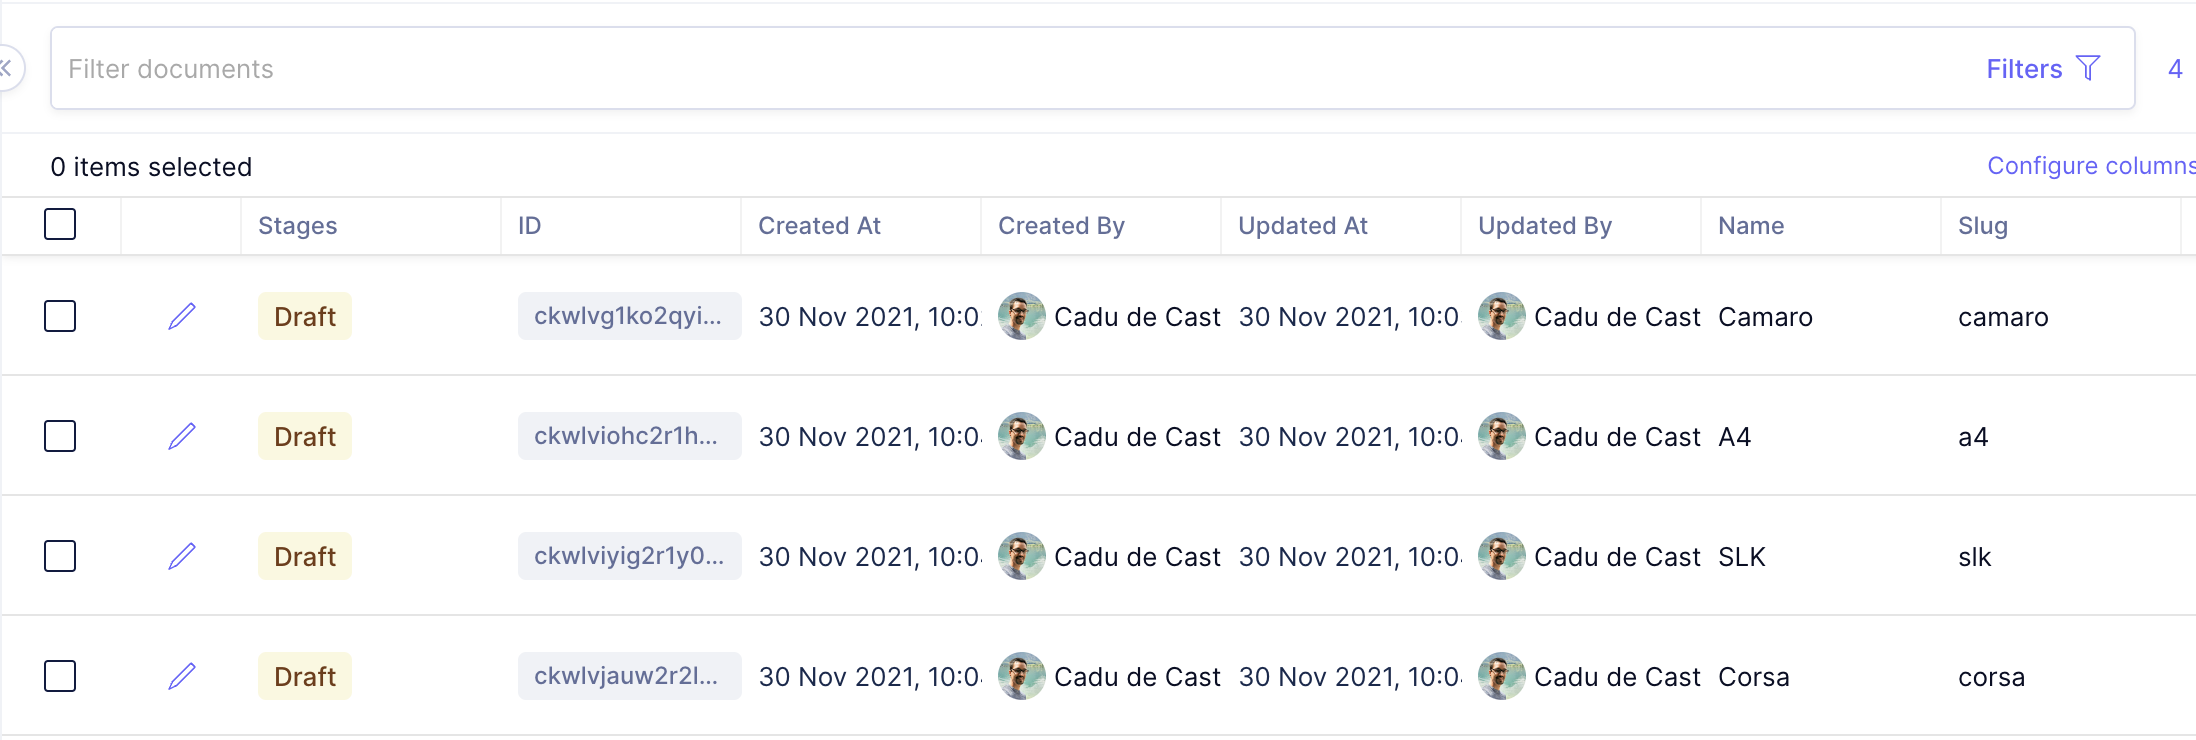
Bonus Step: Displaying the data in content table viewAnchor
Let's say you want to display the data stored in your custom UI extension field in the content table view.
To enable custom table-cell rendering in your app, add FieldExtensionFeature.TableRenderer to the features array in the extension declaration:
// src/extensions/HelloUixWorld.jsconst declaration = {extensionType: 'field',fieldType: FieldExtensionType.STRING,features: [FieldExtensionFeature.FieldRenderer,FieldExtensionFeature.TableRenderer, // Enables custom table-cell rendering],name: 'Hello UIX World',config: {API_KEY: {type: 'string',displayName: 'API Key',description: 'API Key for this UI Extension',required: true,},},};
💡 UI extensions declaration must be re-loaded every time the declaration changes.
The SDK provides a isTableCell boolean that you can use to detect that the current extension instance is rendered in the content table.
Therefore, change MyField() method like the following code:
// src/extensions/HelloUixWorld.jsconst MyField = () => {const { value, onChange, isTableCell } = useUiExtension();const [localValue, setLocalValue] = useState(value || '');useEffect(() => {// onChange doesn't works on table cellif (!isTableCell) {onChange(localValue);}}, [localValue, onChange, isTableCell]);// Display value in the table contentif (isTableCell) {return <p>{value}</p>;}return (<input value={localValue} onChange={(e) => setLocalValue(e.target.value)} />);};
Congratulations!Anchor
You've just learned how to build custom UI Extensions for GraphCMS!
Take a look into these UI extensions examples for inspiration.
Additional Resources
